Tuesday 27 July 2010

Giveaway Reminder and BlogLovin'

Hi All, just a quick reminder that my giveaway is still open for entires - loads of funky 1980's sewing patterns up for grabs!

Also feel free to follow my blog on BlogLovin':

Follow my blog with bloglovin

Friday 23 July 2010

1980's Sewing Pattern Giveaway!!!

ROLL UP, ROLL UP!!

Announcing the first Su Sews So-So GIVEAWAY!!

And what a whopper it is! Well OK...perhaps I am building this up just a tad. As I mentioned in my previous posts I went a little crazy with the buying of sewing patterns on Ebay and one of the lots included a pile of patterns that are just not really my style so I thought 'lets see if anyone out there in the Ethernet would like them instead'!

So below are the patterns that will be included in the giveaway:


Yep - they are ALL included in the one goody bag! So if you would like be in with a chance of winning these freebies you have three options:

1. Leave a comment on this post
2. Become a follower of this blog through Google Friend Connect (button on the side bar)
3. Do BOTH for two entries!!!

The giveaway is open until 5pm Greenwich Mean Time (UK time) on Friday 30th July. I'll then pick a comment with a random number generator and announce the winner on Saturday.

I'll post anywhere in the world so feel free to enter to matter where you are! And top tip - I don't have many followers so if you comment....there's a good chance you'll win! lol!

Wednesday 21 July 2010

FOs: I *heart* Beach Bag & Queen of Hearts clutch


Oh dear oh dear...
I have been a bit bad with the ol' posting recently! I was actually away on a wee holiday last week, so that's my excuse. I know, I know - I good blogger would have set up posts for the blog in advance...but I just didn't have time! Will you forgive me?!


Well, to make up for it I have not one, but TWO (yep, count them: 1...2!!) FOs to share with you in this post. The first I made a week or so before my holidays and the other literally the night before I left and both came with me to Porto Santo (small island near Madeira) so I was able to do a bit of a 'on-location' photo shoot for them both!

Hmmm...check out that dodgy modelling of the clutch - think I'll stick to my day job!


FO1: Queen of Hearts Clutch
So the first is a very cute little clutch. I pattern is the Curvy Clutch from Keyka Lou Patterns. I have been wanting to make a little clutch ever since I got my sewing machine back in Oct 09 but I couldn't find a pattern I really loved - until i saw this one. Only problem was I had to buy it (ha, so stingy of me hey!). But the other week I caved in a bought it - and I'm so glad I did as I love love LOVE my new clutch.


The fabric is a thick upholstery cotton from Ikea with a bold red and black interlocking heart design and white background. It's quite a large print but I knew the bag would go with almost everything I wear as I love red and black!

Two magnetic clasps to close and a little pocket inside.


This picture also shows a mini 'refashion' of the hat I took with me on hols. I bought this with a beige coloured ribbon and very pale pink flower attached around it which, altho cute, wasn't going to suit my holiday colour scheme. So I just whipped it off, attached a strip of black bias binding around the hat and then found a gorgeous red flower head band which I stretched around the hat as well. Was very happy with the end result. Speaking of refashions, the dress I'm wearing in the first picture is a wee bit of one too. I bought it from Primark (for those readers not from the UK or Ireland, Primark is a really REALLY cheap clothes shop that some how manages to churn out reams and reams of up-to-date fashion at really low prices. Altho it's so easy to go in there and spend £50 in one go, I am weaning myself off it due to ethical reasons...but that's a whole other story!), but it started life out as a halterneck dress with the elastic shirring at the waist. I didn't like the way it sat on my boobs and it was too long, so I just cut off the bust section and now I can either wear it as a dress with a belt on (as above) or on my hips as a long skirt!

FO2: I *Heart* Beach Bag


I still had a tonne of the heart fabric left over after making the clutch so I used it for my beach bag. And I am pleased to say that this is a 'Su Sews So-So' original! No pattern used, I just copied another similar size bag that I owned but made a few changes such as the straps going all the way down the side of the bag. The inside isn't lined but I bound all the seams with black bias binding and also put a strip around the top inside and top outside. This bag was a dream to use and came with me EVERYWHERE on holiday - I could fit so much into it!! I'm just so pleased with how it turned out - and I managed to make it in about an hour or so! I'm thinking about writing a wee tutorial for it so let me know if you would like it - it's very easy but sometimes it's nice to just see it done in pictures isn't it!


Well, you can't call it a beach bag if it doesn't get a trip to the beach!!!

I spent my holiday dreaming up my next projects so now that I'm back I can't wait to get cracking! I have so many things that I want to make I just don't know where to start!! I am severely behind in making things for SSS so I think I should probably focus on those items first. In my last post I mentioned that I would give away some of the patterns I got off Ebay, so I shall stay true to my word and that will be my next post - I hope you can check it out!

Friday 9 July 2010

Putting the RUFF in Ruffles!

I had to share this find - it's just too crazy and wrong for words! As I said in a previous post, I have been spending a bit of time on E-bay recently (erm...too long me thinks!)..and while browsing sewing patterns I happened upon this...this...this....well....I don't know what to say about it!!!


WHO DOES THAT??!!! Crazy I tell you!

So I ordered 5! ;)

*****

On another note, I have received a good few of the patterns I ordered on E-bay this week and I was excited to rummage through the patterns included in this lot:


Unfortunately...as I had mentioned before, there were quite a few 80's shoulderpadded crimes to fashion included in the mix. Really not my cup of tea. So - here's the thing...I'm going to offer them up to anyone out there on the Ethernet who might be into those sorts of things. I'll do another post showing each of the patterns up for grabs - my first give away of sorts!
Out of the mix I did manage to score a few patterns which I think I will enjoy making.

But hey - my loss could be your gain! Stay tuned for the 'give-away' post!

Tuesday 6 July 2010

Pattern Challenge: New Look 6902

As I have moved over to a new blog (visit my old one here: Starfishes) I guess I should mention that I had previously signed up for a couple of challenges - I thought it would be fun to give myself goals to aim for rather than just doing random sewing. To be honest though, my sewing has still ended up being rather random (although I do have a game plan afoot.....more on this in another post)!

The first challenge I signed up for was the Pattern Challenge, hosted by the lovely Sarah from Come and see the Seitz where I signed up to produce some summer gear and drafted my own goal of:

To make 3 Summer outfits by June 30th

Erm...yes...ok - didn't quite meet that goal very well! But to be fair, when I made that goal I didn't realise that I was going to be moving in with my boyfriend and have my sewing machine stuck in a box laden corner for a couple of months!!! So that's my excuse and I'm sticking to it! Ah well - since I made the goal, perhaps I can tweak it - shall I move the goal post to read "the end of August"....that way it will tie nicely in with my second challenge:

Self-Stitched-September, hosted by the equally lovely Zoe off of 'So, Zo...'. For this challenge I have pledged:

'I, Suzanna Wilson at starfishesbelfast.blogspot.com, sign up as a participant of Self-Stitched-September. I endeavor to wear at least 1 handmade or refashioned item of clothing and/or accessories every day for the duration of September 2010'


It's a very big challenge for me, and I will be so impressed if I managed to pull it off. Lets hope I do keep up this sewing momentum and can produce enough gear to last a month!!
 
Find links to both challenges on the right hand column of my blog.
 
So, on to my latest FO: New Look 6902
 
Look guys - I'm smiling!
 
Basic compared to most of the gorgeous stuff being produced by the other seamstresses online, but I'm still a beginner - so you have to start somewhere!!
 
The main purple fabric is actually out of my mother's stash (hers is like an Aladdin's cave - I salivate every time I look at it!). Perhaps not exactly what I would have gone for had I been buying it for myself, but since it was free I can't complain! I had a real issue trying to decide what would make a good contrasting band and straps. I played with the idea of green or yellow for quite some time, but in the end I had a tiny bit of red in my stash left over from my blue skirt and thought - why not! To justify my pairing of red with purple please see these stylish examples:
 

Yes, far superior items to mine but they are totally rocking red and purple! Anyway, on to the pattern review:
 
Pattern Description: New Look 6902. Shift dress with contrasting band and straps. Gathered under bust and zip down the back.

Pattern Sizing: Based on my measurements I cut a size 14 (with a heavy heart) to make the muslin. Although it looked ok, I knew I could get away with going down to at least a 12 - so the FO is made a size 12 (I could probably got into a 10, but I wanted a comfortable summer dress!).

Did it look like the photo/drawing on the pattern envelope once you were done sewing with it? Yes

Were the instructions easy to follow? Generally yes. I'm a beginner so most instructions take a while for me to decipher!

What did you particularly like or dislike about the pattern?
Likes: The different variations and combinations of tops, straps and skirt lengths - lots of fun options.
Dislikes: The dress on it's own seemed to lack a certain je ne sais quoi, but once I added a belt, cardie, accessories I realised the dress had a lot more potential. I think the belted help by making me look a little less pregnant without it! (I'm NOT pregnant btw!)

What techniques did you learn: I'm new to sewing so I learnt loads!
- Gathering...yep had never done that before
- adding a lining to the bust section and stem stitching it down
- sewing in a exposed zip (still need practice in that)

Fabric Used: 100% cotton from my mum's stash. Purple is a rather crisp batik cotton from Indonesia (I used to live there) and the red is a very soft quilting weight cotton.

Pattern alterations or any design changes you made: none - done by the book!

Would you sew it again? Would you recommend it to others? I am tempted to make a maxi version of this, maybe with a different strap/top combo but the poofy skirt makes me a bit hesitant - perhaps a fabric that draped better would overcome this issue

Lessons I take away with me: Well I learnt to be more careful with strap pinning and that making a muslin is advantageous - I pinned one of the straps in with a twist and didn't notice until it was all sewn it and impossible to unpick! The FO had straight straps! I need to be more careful with strap positioning - the straps are totally out of line from my bra straps, which is a shame. Also, I need to practice sewing a zip in a lot more, as my work was a bit shoddy. Also, my mum pointed out a way of finishing of the body before sewing in the zip which gives a much neater finish - this wasn't mentioned in the pattern at all!!!
 
Doh, dodgy work!

With a little bit of accessorising!


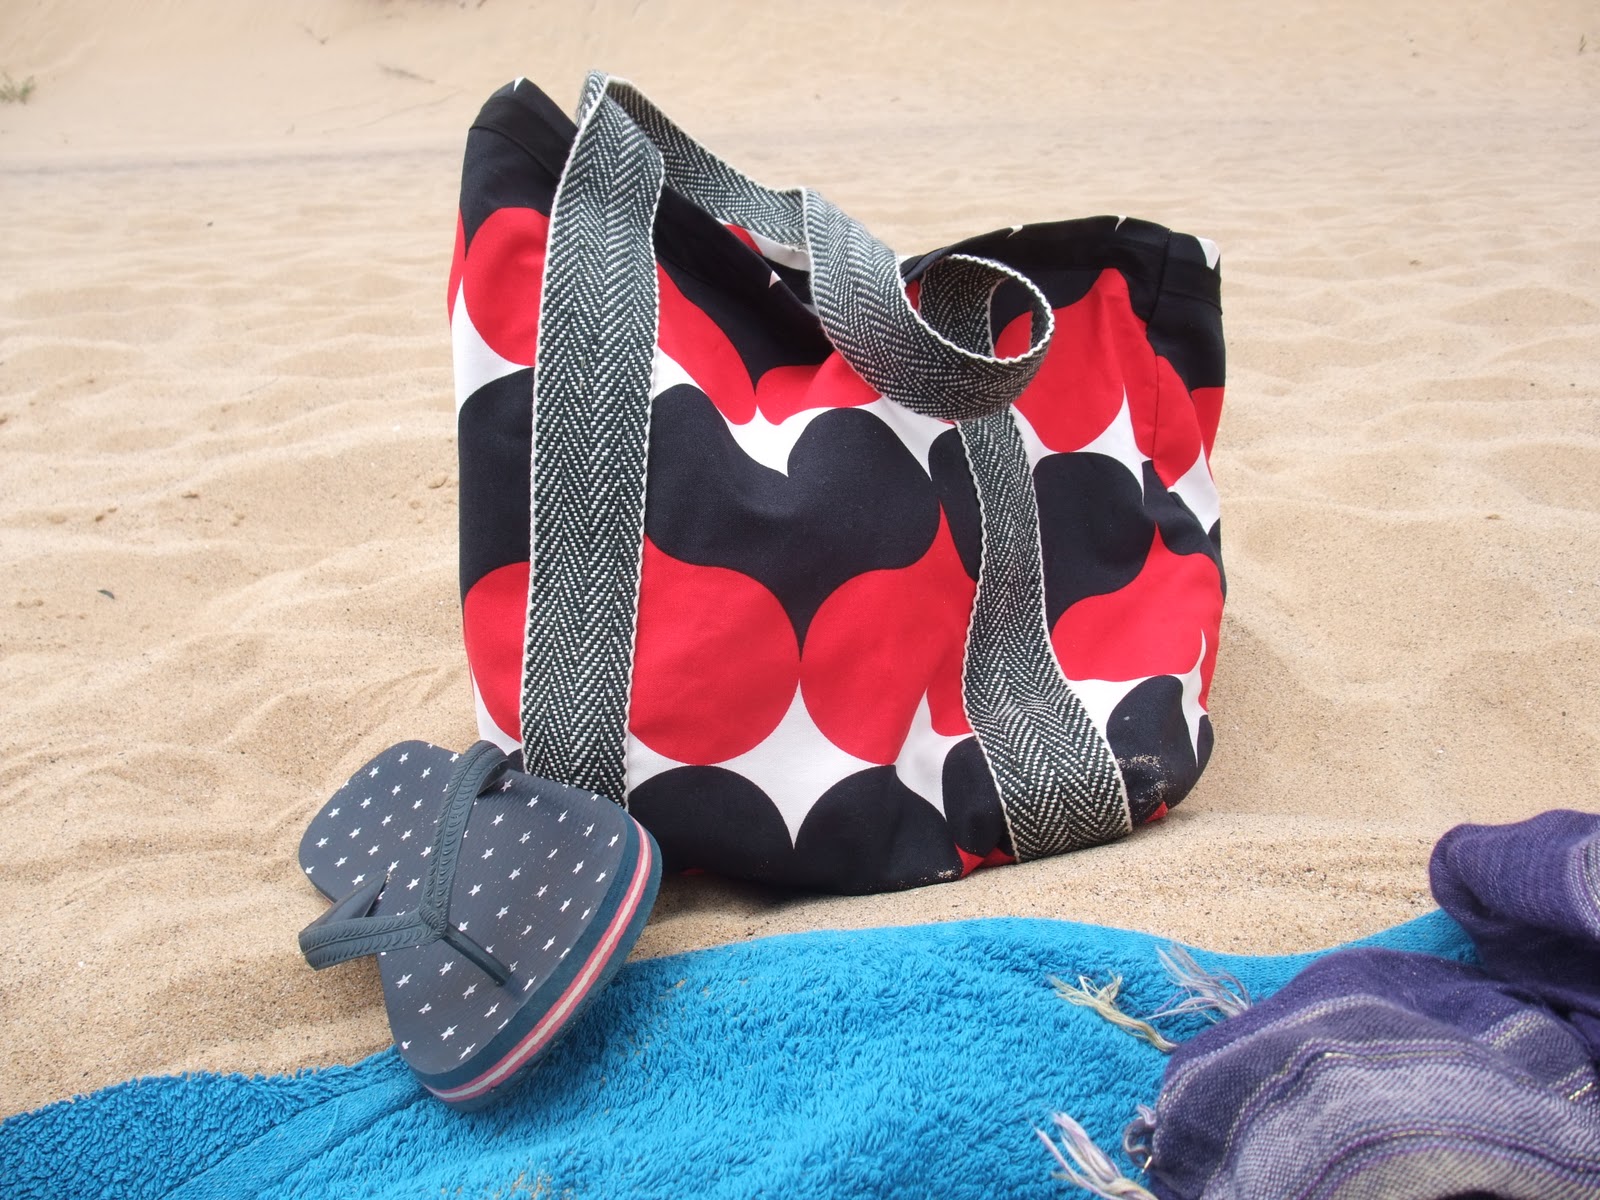
Phew! Sorry for the mega long post!! The next project I'm working on is a little red, black and white clutch and also a beach bag. I'm off on my holidays next week and it would be nice to take them with me!!

Monday 5 July 2010

iPhone + Ebay app = Expensive Addiction!!

Oh dear...this weekend I discovered the E-Bay app for my iPhone. I'm not sure why I hadn't discovered it sooner, but I think that can only be a good thing...otherwise I think by now I would be broke!

The E-Bay app is soooo easy to use. In fact, I think it is easier to navigate that the web version. It's so easy to search for things, browse them and the easiest thing of all - placing a bid!!!!

So, after my busy weekend on E-Bay I am the proud owner of the following items which are currently winging their way to me:

 A job lot. They only had one pic so I had to just take a chance on this one! Most look a bit like 80's power suits with HUGE shoulder pads (shudder - one of my pet hates...I don't know if I will ever be able to like them!). I was attracted to the job lot though for the three patterns in the bottom left of the photo - some potentially nice patterns there - lets hope I'm right!

 I was looking for a blouse pattern when I stumbled on this auction. Decided the blouse was pretty nice, and the dress and trousers an added bonus! The envelope is ripped but the description assured that the pattern was intact - so I hope they were telling the truth!

 From reading all the lovely sewing blogs out there I have discovered that vintage pattern sewing is a really popular choice - and seems to be some-what addictive by the sounds of it! This isn't perhaps as vintage as most bloggers are going for, but it's still from the 70's. I was drawn to this pattern for the yellow and blue dresses - I think their styles would suit me quite well.

Another 70's pattern and I LOVE this one!! I'm so glad a won this auction! I'm just loving the wrap-around shirt action and I know its a style that will suit me well. The only issue is that its a size 14 - and I'm probably more a size 12....so I will have to make a muslin and see how much I might need to take it in (for my prides' sake...please let me have to take it in!!! - for my laziness sake, maybe not having to have to take it in will be ok!)

I also discovered that you can get back-copies of Burda Style magazine on E-Bay...but apparently a lot of other people knew that as well and I was outbid on two copies. Damn it! I shall keep looking!

Thursday 1 July 2010

Shirt Skirt

So...(or sew?)...my first post on my new blog is an FO - yeay! That's the way to start - lets just hope I can keep the momentum going!

I had seen a few tutorials on the web for making a mans shirt into a cute skirt (check out: The Sewing Elf, Adventures in Dressmaking and Craftstylish.com) and when my bf announced he was going to thin out his shirt collection I knew I had to grab one and try it out for myself! The biggest problem though was choosing a shirt that I considered would make a decent shirt....the shirts my bf was chucking, he was doing so for a reason - they were nasty! In the end I opted for the least offensive....but it's brown and maroon, not really my favourite colours...but sure, I thought I'd give it a go anyway even as a learning experience if nothing else!

So here is the shirt as it started out in life:


I cut the sleeves off and cut the bottom part off just below the arm holes:


And then I...er...I stopped taking photos!!! Whoops! Sorry about that. I think I just got too carried away with making the thing that taking photos became less of a priority!

Anyway, I shall attempt to talk you through what I did....

Main Section:
I had hoped that I would just be able to sew on a waistband and be done with it - but alas, life is never that easy! It was much bigger than I wanted so I pinned the sides and sewed. I kept the original base of the shirt  though as it created a nice shape.
I sewed in a hidden clasp between the first and second button to stop it gaping open when I sat down - that was a big help!

Waistband:
Hmmm...I pondered a lot about this. I had hoped that I could use the section from the main shirt body that was left over - but it was too short - curse that big ass of mine!!! So I had read that one of the tutorials used the cuffs of the sleeves to create the waistband. After close inspection I figured that I could indeed use the cuffs for the front of the waistband but I needed to find something else for the back. I ended up cutting double thickness (double the width of the cuffs) sections of the sleeves to make the back of the waistband.
I really loved how the waistband turned out actually - the detail of the cuffs really created a nice aspect - and I used the button holes already there which was a bonus! To keep the design the same on both sides I had to position the cuffs with both buttonholes to the middle, so I just sewed on a button on top of the buttonhole not being used.
The sides of the waistband had to be tapered in to create a smooth line too.

And the final result:


 Close-up of waistband

 Close-up of waistband, open to show symmetry


Thoughts:
In general I am really pleased - particularly with the waistband. It's a tiny bit smaller than I would have liked, that's totally my own fault - pinned too much! And as I said before, it's not really colours I would choose, but I luckily had a maroon top which matched quite well. But all in all, I'm happy!
The best thing though - I made it in one night and wore it out to the pub that night too! Instant gratification!!

It's a really easy process and I plan to try it out again. Unfort my bf doesn't seem to want to give up any of his nicer patterned shirts (even for my good cause!) so I found a cute pink and white stripped shirt in my local charity shop which I will be trying it out on soon.

Come on people - let's FOCUS!

(source) (btw - thats not me in the pic!)

Su Sews So-So!!

I've decided to start a-fresh and make a new blog which focuses on my sewing. Hopefully this will spur me on to create more FOs rather than just think about all the lovely things I could make!

If you are new to this blog, I was previously blogging at:


I will still keep that blog active so that everyone can continue to access my older posts, but the majority of posts will be on this blog....

OR my cooking blog:


SU-YUM! is where I record all the dishes that I make (well, the ones that turn out well and are tasty) so that I have a reference - a way to inspire me on days when I don't have a clue what to cook!! Keeping it public though, so feel free to have a browse.


Related Posts with Thumbnails