Showing posts with label dress. Show all posts

Friday, 18 April 2014

A Girl For All Seasons - Sew Dolly Clackett take 2!

My second #SewDollyClackett dress! I mentioned in my first post that I had originally bought the lovely synchronised swimmers fabric with plans on making an Anna dress, but I quickly decided that it wouldn't feel right to make an exact replica of one of Rosin's dresses, so I decided to make up the Anna in the floral fabric and use the swimmers fabric to make a Cambie - another one of Rosin's favourite patterns (or it was anyway).

I first made the Sewaholic Cambie as a practice for my Wedding Reception Dress, and then for the actual dress. However, as I mentioned in those posts, I made a very silly mistake and read the finished garment measurements rather than the size measurements - so I cut my pattern pieces are the wrong size! The main issue is around the waist, which was far too tight in the floral Cambie, so for this version I added a cm to each bodice piece as well as the waistband. 
Due to the way you assemble the Cambie, it's actually quite hard to tell fit until towards the end and when I first pulled up my zip I was dismayed to discover that the extra cms hadn't seemed to make much difference. As a last resort I trimmed down the seam allowances on the waistband and waistband lining as much as I possibly could - and was relieved to discover that that made a MASSIVE difference - phew!!
The other change I made was to try out the straight neckline variation (tutorial here - it's pretty simple!). I have always loved the look of the straight neck and thought that the dress would probably have enough going on with all the swimmers without a sweetheart neckline as well. I really love the way the straight neckline looks, but unfortunately it gapes a bit, which I'm disappointed with. I also seem to have decapitated a few swimmers, which, when I was cutting out the pattern pieces, I thought I wouldn't do - whoops!
Speaking of pattern placement - check out that centre back!!! I am just slightly more than chuffed with how well it lined up! You can see a few finger tips peeking out which actually wouldn't have happened if I had have aligned the zip up as it should have been. However I was getting worried about the fit and placed the zip as close to the edge of the fabric as I could (which I'm glad about now!!!). When I first bought this fabric, I didn't think for one second that pattern placement would be an issue, but when it came to cutting out I realised that the swimmers are in both horizontal and vertical lines - eek…it's essentially a plaid! lol. I spent quite a bit of time ensuring the ladies lined up properly, and thankfully it turned out pretty well (for the most part!).
In honour of Rosin's original Syncronised Swimmers make, I am calling this dress the Girl For All Seasons Dress and I'm not even going to pretend that I wasn't a big Grease 2 fan when I was little!!!
The second homage to Rosin are of course the spectacularly sparkly numbers on my feet, as we all know that Rosin has a wee bit of a soft spot for fabulous shoes (I want ALL of her shoes!!!):
I am really pleased with this dress and can't wait to wear it. I was a little nervous showing the dress to my husband as it's a little more out there (fabric wise) than my usual makes, but I was surprised to find that the husband loves it - in fact I think it might be his favourite make so far! So a massive thank you to  Sarah and Clare for thinking up this fun contest and of course to Rosin herself for her fab sewing style which has given me an excuse to sew outside my comfort zone!
Now let's have one last look at those shoes shall we…

Tuesday, 8 April 2014

Hey Dolly Clackett - this one's for you!


I'm so excited to finally be able to share my entry for the Sew Dolly Clackett contest! The sun was refusing to shine and life was getting in the way of photo opportunities that for a while I was thinking I was never going to get this project up on the blog. Thankfully the forces aligned and here we are.
This is the By Hand London Anna dress, which, to be honest, probably doesn't need any introduction at this stage as I am quite sure I am the LAST person to have tried this pattern. I was always a little bit nervous that it wouldn't be very forgiving on my tummy so up until now was giving it a wide berth, even though I loved the style. But then the really fun contest cooked up by Sarah and Clare came along and I knew this would be my opportunity to give the pattern a go. Rosin has made a number of Anna dresses, my absolute favourite being her Beauty School Dropout dress - honestly, it is just fab!
Next decision was what fabric to make it out of. This pattern asks for FOUR meters of fabric…which is quite a lot. I had actually managed to track down some of the fab synchronised swimmers fabric that Rosin had used, and did in fact buy 4 meters. But then when I got it I decided that an exact replica wasn't quite what the contest was about so I now have some fun other plans for that fabric. Instead I turned to my stash (yeay - stash bustin' time!). I didn't have 4 meters of ANYTHING in my stash but I did have some beautiful floral cotton from Thailand that I had been saving for just the right project. I knew it would be PERFECT for a maxi dress, but I was sceptical that I would be able to squeeze an Anna out of it. However, sometimes if you want something badly enough - you find a way!!
I had 3 meters of the fabric, which was helpful, but it was unfortunately very narrow and I had to do a lot of reshuffling of pattern pieces. I threw together a really quick toile/muslin as I had a suspicion that I wouldn't need to cut the full length of the skirt pieces, and I was right. 7 inches could be easily lobbed off the end and I'd still have enough for a narrow hem (erm…just! I had to do the smallest of smallest narrow hems and I can only wear this dress with flats!!). Even so, I still had to cut the back skirt pieces upside down. Initially I wasn't happy about this but eventually decided that the floral pattern was busy enough that no one would even notice. And based on Rosin's most recent blog post I am now thinking it was fate ;)
Even though I am late to catch the Anna train, I am now so fully onboard, in fact I think I'm going to ask the conductor for this hat - it is a brilliant pattern and I am so happy with how my dress turned out. Actually, one of the BEST things for me was the fact that I didn't do a single alteration - it pretty much fits straight out of the packet (so to speak) - LOVE THAT! If I had to be really picky I would maybe say I need to make the bodice a smidge longer/lower the waist line. But that really would be nit picking.
The dress was made using french seams throughout, apart from the centre back and the seam with the split. Speaking of the split, I decided to go a little conservative and not have it opening quite as high as the pattern suggests. And believe me, the split certainly shows enough when the wind blows! The seam with the split requires you to tuck the raw edges in and slip stitch down. This creates a really beautiful inside, but man is there a lot of hand stitching to do! I really wanted to keep the insides as beautiful as possible, which is why I went with the french seaming, but when I got to the centre back seam, which has a zip, I wasn't sure what to do to keep it 'pretty'. The fabric is really light weight and practically frays while you look at it so zigzag or pinking wasn't going to cut it. I could have treated the seam as I did the split seam, but to be honest I am not a huge fan of hand sewing. So I ended up using my overlocker. Not as pretty, but a compromise I was willing to live with.
Because the fabric is so fine, it is a bit see-through and I thought a lot about whether I should line the dress or not. One of the reasons I wanted to do this (apart from the obvious reason of making it less see-through) was because I thought a facing would be visible around the neck and would look ugly. The lining needed to be cotton because I wanted this dress to be comfortable to wear during summer but I only had white in my stash and when I held it up to the purple you could actually see it through the fabric and I didn't like the effect. So…I decided to forego a lining and to finish off the neckline I  used purple bias binding (bonus stash busting - I had a PERFECT match of bias binding in my stash with just enough to do me…I think I had about 10cm left after this project!!!). In order to combat the see-through issue I just wear this dress with a skin coloured slip instead.
Su Sews So So Floral By Hand London Anna Dress 14
The photo above has some strange wrinkles going on, but I don't think it has anything to do with the fit or sewing, more just the nature of the fabric - it creases very easily!!!
Anyway, all in all I am so happy with my new dress! It has already been worn out twice and I've received lots of compliments. So even if I don't win in the competition I feel I have won already (cheesy enough for you?!!!).
Oh and finally - here's to Ms Dolly Clackett and her lovely husband to be! All the best for the wedding and married life (oh, and have a fab time in Paris!!!).

And here's a wee fun gif of the dress in action!!!


Tuesday, 25 March 2014

Under The Needle

So even though things are a little quite on the blog at the moment, things are pretty busy in the sewing room! I thought I’d share some sneaks peaks…

On Instagram the other week I revealed that I have FINALLY jumped on the Anna (By Hand London) bandwagon:

Anna Dress

I’ve been working on this dress for the Sew Dolly Clackett competition and I am sooo in love with it – now I can appreciate the hype that this dress was receiving when it first came out! Here’s a sneak at the fabric I’ve used:

7979c1d09f49e91fffb802e1136e2d86

I cannot WAIT to get some photos done so that I can share it with you. I just have the hem and a LOT of hand sewing to do first (doh – my two biggest nemeses!)…

As well as the Anna dress, I recently decided to give ‘production line’ sewing a go. So I currently have 2 Plantain tops and 4 pencil skirts cut out and waiting for me to stitch up! Expect to see Plantains in these fabulous knits appearing soon:

StripesZebras

And these are 3 of my planned pencil skirt:

ZigZag Skirt Floral Linen Skirt Pink Linen Pencil Skirt

I’m hoping that sewing the skirts at the same time will mean I get things done faster and procrastinate less! Hmm…watch this space…

What are you working on at the moment?
Anyone else joining in with the Sew Dolly Clackett competition fun?
Have you ever sewn up a pattern in multiple fabrics at the same time and how did you find it?

Saturday, 1 February 2014

Floral Laurel

Su Sews So So Floral Laurel 5

I started making this Colette Patterns Laurel dress back last year, when they announced the amazing contest. But I didn't give myself very much time (oh, and I had a wedding to plan!), so didn't make a muslin first. When I first tried on this dress, which had been cut to the original length (a lot longer than this), it was very big, very baggy and very unflattering. I was disheartened and didn't have the desire to fiddle with the fit. So it sat and languished in my sewing room for many months.

Su Sews So So Floral Laurel 3

The other week or so I decided to give it another chance, because I really loved the fabric (which I had bought a couple of years ago when I was in Thailand). I decided that it would work much better on me if it was more of a tunic/mini dress length. So I lobbed a massive chunk off the bottom and declared it passable. Yes, just passable. I'm not really in love with this garment, it's alright, but nothing spectacular. 

Su Sews So So Floral Laurel 6

I think the main reason why I am not in love with it is the neckline (which I have conveniently 'hidden' in these shots I see! lol) - it's just not the most flattering shape on me. Perhaps I may have a look at it another time and see if I can scoop it out a bit. The whole shape of the dress is also not one I would normally go for. I tend to lean towards shapes that nip me in at the waist, so to have something hang so loosely on me feels a bit foreign, and is something I find hard to get used to. But at the moment it is a nice dress to 'hide' in (click here to see what I'm on about- no I'm not pregnant!).

But - would you believe it, this is the first time I have actually sewn/inserted sleeves! I found it relatively easy, but it certainly wasn't a perfect execution - however, when I looked at other Laurels I see that there is just quite a bit of extra fabric in the sleeves. Some people have put in little pleats at the shoulders which I think looks very cute, and may be a nice option if I make another one.

Su Sews So So Floral Laurel 1

On a positive note - this was a successful 'Stash Bust'! So I'm happy about that!

Oh and I cut my hair! These pics were taken right after so everything is sitting nicely. I've since washed it and I have discovered there is an art to blow-drying a fringe, which I have yet to master!! But I'm so thankful for no longer having to spend an entire evening washing and drying my hair!!!

Thursday, 16 January 2014

A Tartan Washi

Su Sews So So Tartan Washi 7

This wash't a planned make, but after the success of the Red Linen Washi dress I felt like whipping up another one. It's a really easy dress to make and so comfy to wear, I knew I wanted/needed more in my wardrobe. Keen to use some fabric from my stash I decided I would try and use this heavy tartan fabric. I had originally bought it to line my red cape, but when it arrived (one of my usual online purchases) I just wasn't feeling it. So it has been languishing in my stash for a couple of years now - every time I looked at it, all I could see was a picnic blanket!

Tartan Washi 1

On my Red Linen Washi the bust darts were a little high, as was the bodice base, so I added an inch to the shoulders and this made all the difference. It's a perfect fit now. Since the fabric was so heavy I decided that I would use lining fabric for the pockets, otherwise there would have been far too much bulk there (an area that doesn't need any more bulking out, thank you very much!). Overall I'm pretty happy with the dress, and hopefully it doesn't look too 'picnicy'...

Tartan Washi 2

I have a bit of fabric left and I'm hoping there might be enough to make a simple A-Line miniskirt, which I think would be pretty cute. I'm debating whether to buy a pattern or attempt to do a 'rub-off' of a denim skirt I have. I'm leaning towards the rub-off because I can't seem to find a pattern that's exactly what I'm after. We shall see.

OK, now here is my attempt at a fashion bloggers Outfit Shot, don't laugh too much:

Su Sews So So Tartan Washi 3

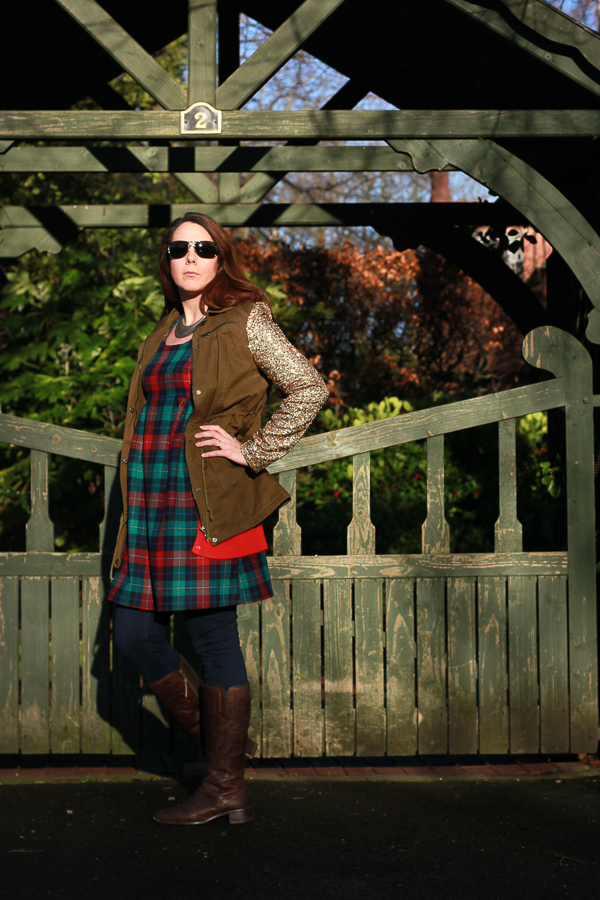
Glasses: D&G / Jacket: TXMaxx / Cardi: too old to remember! / Dress: made by me! / Jeggings: Oasis / Boots: Timberland

Oh yes…the freebies will be flying in…any minute now…any minute...

Friday, 13 December 2013

A Red Washi Dress

Su Sews So So Red Washi Dress 2

Yeay - a newly finished project to share on the blog, finally! 

As I suggested in a previous blog post I have been thinking about making the Washi Dress by Made By Rae as it seemed to be a flattering yet relaxed dress which is just what I have been looking for (see why in this post). 

This is quite a simple pattern with a fitted, empire line bodice, a pleated skirt, inseam pockets and a shirred back. The shirred back is great as it means you don't have to worry about sewing closures (such as a zip or buttons) so it's a good project for beginners or for those looking for a quick sewing fix! The Empire line has the potential to make a dress look like its Maternity Wear, but on this occasion I think it's slim fitting enough to hide your muffin-top without people wondering if you may have an announcement to make!

The pattern also comes with a cute option to cut a key-hole neckline, which on this occasion I decided to go for. A little bit tricky, but I thought since my dress was going to be a solid colour it would add a nice detail. Speaking of which, the dress is made out of a burnt red linen-cotton blend that I have had in my stash FOR AGES! The truth is that I bought it on-line with the plans of making a shirt dress out of it. But when it arrived it was heavier and had a different drape to what I had imagined and so it got put aside until i could think of what to use it for. It's so nice to finally put it to good use, plus I still have some left over which I think might be enough for a skirt.

Su Sews So So Red Washi Dress 1

I didn't make a muslin for this, partly because I couldn't be bothered to be honest and partly because there's not a lot to fit, and the shirred back would provide some ease. Turns out that my bust darts are too high, as is the empire line. But it's not anything major, and if you don't sew you don't notice it!

The cotton-linen fabric is actually really perfect for this dress, although it does crease a lot, as linen tends to do. But that doesn't really bother me very much. It's a great dress for layering up in Autumn/Winter, as I've done in the above photos with a polo neck, jeggings and boots, but I think it will also lend it's self well to Spring/Summer too.

Su Sews So So Red Washi Dress 3

I think this is turning into one of my favourite makes as I have worn it repeatedly and it has been through the wash several times already. I'm lucky that I don't have a very formal dress code in work which means this has been in high rotation and I am keen to make more!

I am the Queen of Cardi's when it comes to Autumn/Winter work attire, mainly because our work heating is so unpredictable, so I actually tend to wear this layered with a cardi rather than with a polo neck underneath (unless it's really cold!). So here are a few renditions:

Su Sews So So Red Washi with cardis

Oh, I also mentioned in a previous post that I was going to start recording how much each project cost me, so here's the low down:

Washi Dress Pattern - £10
Red Fabric (I probably used about 2m from the 3m that I had) - £6
Thread - £0.70
Shirring Elastic (I had some in my stash but found some in red!) - £1
Interfacing  - £0 (had some in my stash, and I used so little it would be very hard to work out the value used!)
Bias Binding for arm holes - £1

Total: £18.70

In summary - BARGAIN!  Totally worth it as I have been wearing it non-stop!

So, are you tempted to try out the Washi Dress for yourself? Or perhaps you have already made it? I would highly recommend it!

Monday, 14 October 2013

The Red Hot Bombshell Dress ;)

I actually made this dress last year and posted this photo up on the blog, with promises to do a proper blog post about it asap:

bombshell dress

Roll on 15 months and I still haven’t blogged about it, so I thought I had better get on with it. Only problem being that I really wanted to take better photos of the dress, but guys – it was pretty figure hugging when I made it…and now it doesn’t fit me! Argh! So you guys will just have to make do with what photos I do have.

This is the Craftsy Bombshell Dress, taught by the very talented Gertie who, I have to say, is a brilliant teacher. The course covers very advanced couture techniques, way beyond my normal sewing skill level. But Gertie takes you through ever step slowly and clearly explains exactly what you need to do and I really would recommend it if you are looking to improve your sewing skills and challenge yourself.

A lot of people have already taken this class and given really good reviews so I won’t go into too much detail, but some of the techniques which I learnt and have found really useful are:

- Using carbon paper to trace seam lines

- Having massive seam allowances and thread tracing your seam lines – this allows for a very accurate fit and is really useful at the fitting stage (see below pic)

Bombshell cups

- Creating a muslin and using this as the underlining to your fashion fabric – and being able to write info on these (like numbering pieces and showing grainlines – see above pic), so so useful!

bombshell shell

- Using batting to pad bra cups – butting seams together (see red zig-zag stiches in above pic)

- Using stay-tape to reinforce curved seams (see above pic)

- Using spiral steel boning – and raiding my husbands tool kit for the job!

- Adding a waist stay and zip guard – both really helpful for getting in and out of the dress.

I used a lot of the skills learnt on this course to help make my Wedding Reception Dress.

313235_10152001621025858_52995582_n

I decided to add a basic halter neck strap to my dress, as I find this more flattering on my body shape than strapless. I was planning to wear the dress to a friends wedding and, as per my usual style, was doing everything last minute – so the halter neck was the last thing I did – and I was sewing it to the dress on the morning of the wedding! Gertie suggests adding buttons to the inside of the dress, and button holes on the ends of the straps, so that you can have the option of strap or no strap, but I didn’t have the time, so I just hand stitched it in quickly. I also just used a strip of fashion fabric, plus some muslin, but no interlining to strengthen it. This turned out a bad idea as over the course of the day the strap creased and folded and didn’t look as good. The stitching also came undone during the night! Thankfully the strap is only decorative so I didn’t have to worry about the dress actually falling down!

424352_10152001621215858_747906372_n

Apart from the strap issue I really do love this dress – I think a large part of that is due to the fabric I chose, which is a cotton that I picked up when I was in Thailand a few years ago. I do, however, have a few criticisms on the dress style and the fabric choice. Although the fabric is a lovely pattern, it’s actually a bit gauzy, and as such I have found that I have to be careful not to catch the dress on anything while wearing it or it can easily get holes in it. And as for the pattern – in these photos, which have been carefully selected, it is a very flattering dress. But in reality, it is not flattering to my rather small bust size (they are rather squashed and I look flatter than normal) and the gathering at the waist actually makes me look like I have a pot-belly! I suppose that is one of the risks you take when you make your own clothes and are trying a new pattern/style – you don’t really know how it will look on you until you have it made up!

That being said, it’s still one of my absolute FAVOURITE makes and one that I am very proud of! If you haven’t taken the Craftsy class, I recommend it thoroughly.

Friday, 6 September 2013

DIY I Do : My Wedding Reception Dress!

RS wedding 605

Well, we had the inspiration post and the muslin post - and finally here is my big reveal!

As I mentioned in the previous posts, I decided that since I had saved money on my main wedding dress, and because it was hard/near impossible to bustle, I would have a go at making a fun and flirty evening/reception dress for my wedding day. 

Su Sews So So Wedding Dress 7

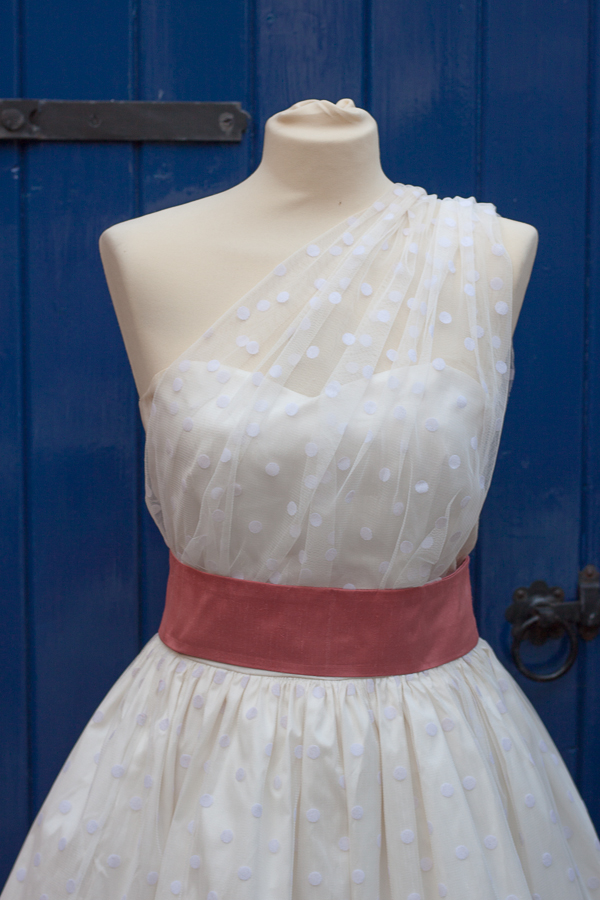
I based the dress on the gorgeous Cambie pattern by Sewaholic, but adjusted it to be strapless. This meant that I had to introduce inner construction details such as boning and a waist stay. I used skills that I had learnt from Gerties Craftsy Bombshell Dress course as well as the Susan Khalje Couture Dress course.

IMG 0853

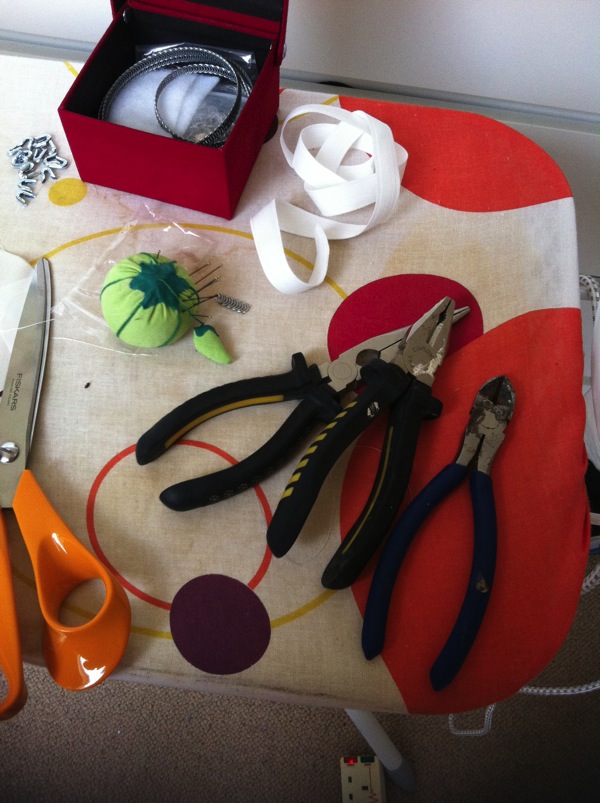
Because Gertie is an advocate for the spiral steel boning and I had previously used it in my Bombshell dress (which I still haven't blogged!!) I thought I should stick with what I knew and use it for this dress. It takes a fair bit of force and fiddling to cut the strips…and I had to raid my husbands tools box:

IMG 0855

…but it's totally worth it as the freedom of movement you get from them is great.

Su Sews So So Wedding Dress 12

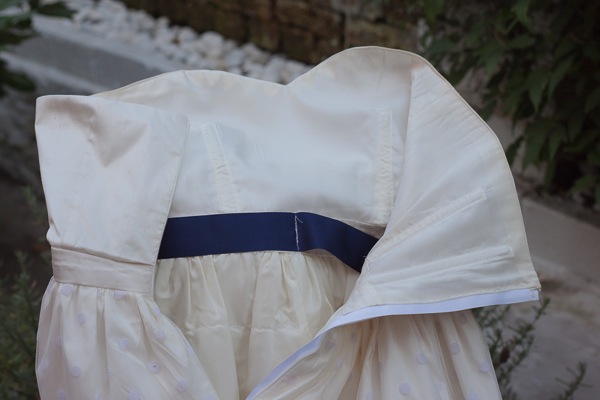
I decided to bring in the blue theme and used a navy blue grosgrain ribbon for my waist stay. I probably should have sewed it in with matching thread - but I was actually working on this until the day before and I think by that time I was just like "I DON'T CARE JUST GET IT DONE"!!! But that aside, the waist stay was an absolute necessity to get the dress zipped up - it holds the dress in place and takes the weight off the zip.

The main dress was made up of a beautiful ivory silk dupion that my mum picked up at a market in Spain for €5/m - yes you read that right, €5 PER METER for real silk dupion!!! The english lady who ran the stall at the market is a retired bridal dressmaker and was selling off all her stash. I think I got my mum to buy about 5m of the ivory for me because at the time I still thought I might be making my main wedding dress, which would have been full-length. So I have quite a bit left in my stash…what to do with it??!!! I'm contemplating trying to dye some and see what it's like. Anyway, I'm getting off track here.

I added in some couture techniques to this dress, such as underlining the silk dupion with silk organza and also basting on all the sewing lines. This was the first time I had worked with silk organza and I loved it. It's such a lovely fabric to work with and gave a little bit extra body to the dupion, which was quite a thin fabric. The dress was lined in the most gorgeously soft and flow-y lining that I bought online at Truro Fabrics. It was more than I normally spend on lining, but em...I recon you can afford to splurge when it's your wedding dress!

Su Sews So So Wedding Dress 13

This is a close up shot of the zip guard that I sewed in with a pick stitch. Again, just another little couture feature. The zip itself was actually an invisible zip which I thought would suit the style of dress better due to the tulle overlay I was doing.

Su Sews So So Wedding Dress 10

Su Sews So So Wedding Dress 6

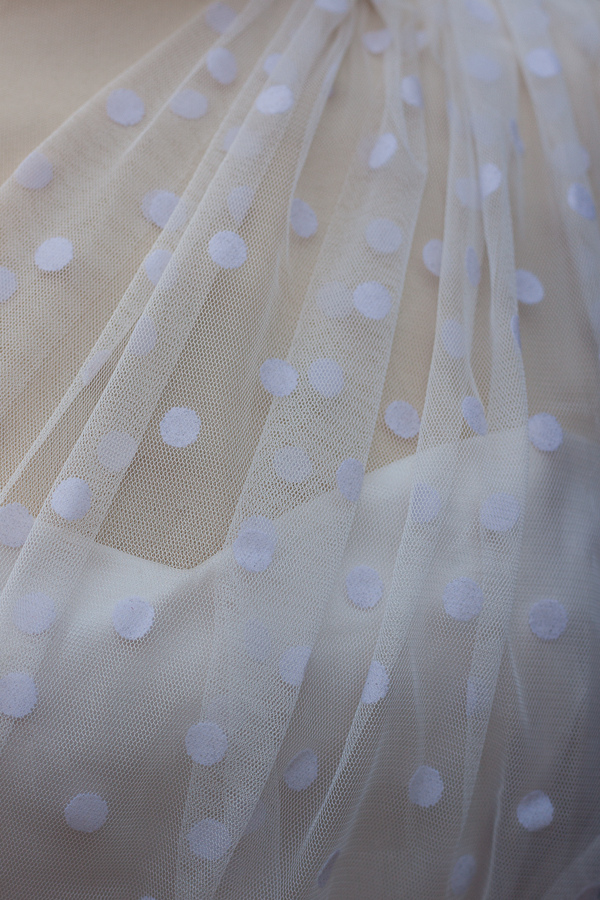
I had a lot of deliberation about how I was going to do the asymmetrical polka dot tulle detail. I initially wanted to build it into the dress, but I obviously didn't have a pattern piece for the tulle and would have had to drape it on me, before the bodice was attached to the skirt - and physically it was impossible. So I decided to make a sort of sash/belt with the tulle attached to it. The draping for this took AGES and was really difficult to get right. It also didn't help that I was doing this the week before the wedding - talk about pressure!!!

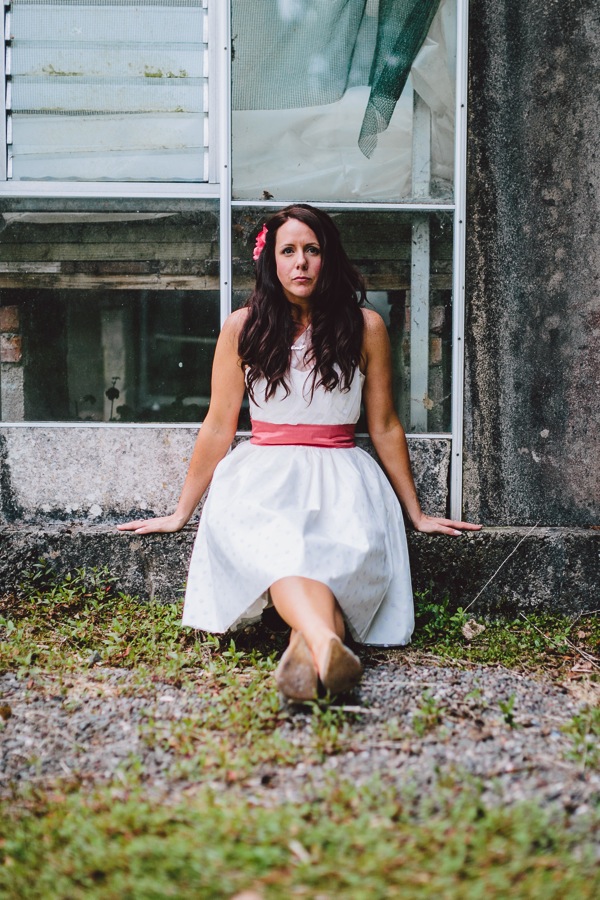
I also decided to make the sash out of the same coral silk that the bridesmaids sashes were made from. I realised this erred on the side of bridesmaid in itself, but as soon as draped the coral silk around the dress I fell in love and it just had to be! Plus I asked my florist to give me a Coral Charm peony to pin into my hair - so it tied together with the sash colour perfectly. 

RS wedding 604

The skirt was made by cutting the full style Cambie skirt (minus pockets - I was tempted, but due to the tulle, decided against it…but I do love Wedding dresses with pockets!) out of both the dupion and the tulle and treating as one layer. Under this I had another layer of very fine plain tulle and then to the lining I sewed two rows of stiff gathered tulle to create volume. This is also how I made the flower girl's dresses.

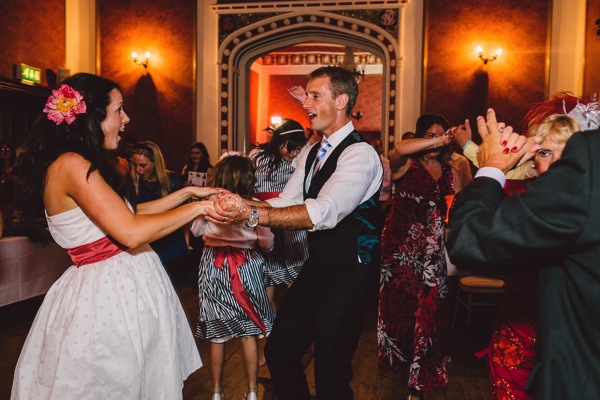
The dress was a lot of fun to wear and to dance in and it was great seeing people's reactions when I came downstairs in a new dress for the evening! The added bonus was that it really showed off my beautiful Jimmy Choo shoes, which up until then had been rather hidden!

I'll leave you with a few professional photos from our mini couples session once I changed dresses (we snuck out during dessert to take these in an abandoned greenhouse/yard at our wedding location) and some of the dancing:

RS wedding 574

RS wedding 587

RS wedding 594

RS wedding 612

RS wedding 623

RS wedding 628

RS wedding 629

Related Posts with Thumbnails