Friday, 27 September 2013

A Sewing Epiphany?

Close Up on Presser Foot Sewing Over Stitch Starter and Onto Fabric

Image sourced from HERE

Now I know this may not be news to many of you, and you may already subscribe to the Craftsy Blog and will therefore have seen this recently, but I thought I would share it here just in case it might help someone else.

This has to be one of the things that I find most frustrating and annoying when sewing with a lightweight fabric (such as chiffon or silk). You spend so much time and care to prepare your fabric, using special pins, cutting it out sandwiched between two layers of tissue paper, changing your needle…and then you put the fabric under the sewing machine foot, press the pedal down and watch the fabric get eaten up by the machine! I can tell you this has definitely caused the most swearing and screaming to come out of my sewing room over anything else!

I did learn the trick about holding onto the needle thread and bobbin thread before you start sewing, and quite often that does it, but not always. So when I read about using a Stitch Starter on the Craftsy Blog, it honestly felt like an epiphany. It’s so simple but solves the problem – and it works on bulky fabric too (to avoid that horrible jamming and birds nest worth of thread accumulating on the underside of your fabric! I’m really excited to give it a try – and I’m currently working with some very misbehaving slinky fabric so it’s perfect timing.

If you are interested in finding out more about a Stitch Starter check out this post.

I also see that the Coletterie has just written a post about sewing with delicate fabrics which might also be useful.

Disclaimer: I have just realised that this post sounds like I’m getting something from Craftsy, but I’m not and they haven’t contacted me, I just wanted to share the information!

Thursday, 26 September 2013

Thoughts on sewing and weight change

c75f982c094ab7157bae39ceae680aea

Firstly, can I just send out a massive ‘thank you’ to all the wonderful people who left such lovely comments on the post on my wedding reception dress – they made my day/week/month!

Secondly, how awesome are those Christian Louboutin tape measure shoes, in a kind of OTT-I’m-a-little-too-obsessed-with-sewing kind of way…

OK, now onto the topic of this post!

415f19d98c1a82b82b191c85da486efe

So, I’ve been back from my honeymoon for about two months now…and while I have actually been doing a little bit of sewing, to be honest, my heart is not in it. You see, I think I may be the first bride in the history of weddings who actually put ON weight before her wedding! In fact, I’ll let you in on a little secret. When I came back from my honeymoon I had to go out and buy some new clothes to wear to work that would hide my belly for fear that I would start a rumour that I was pregnant – yes honestly, I had developed a little pot that looked like a bit of a baby bump!!!

Actually, I’ve noticed that since I’ve hit my 30’s it’s not as easy staying in shape as it used to be (yes, we’ve all heard that before – well I can confirm that it is true!), and also…living in a happy stable relationship (not complaining) has also been bad for my waistline.

Because of that, i haven’t really sewn as much as I used to. I keep looking through all my lovely fabric and daydreaming about what I’m going to turn it into (come on, I know you do it too!), and then I’ll fold it up and put it away, saying that I’ll make that dress/skirt/top when I’m back to my old weight. But I’ve been doing that for over a year now – it’s not good!

Now I know I’m not overweight, so please don’t be giving off to me about complaining about my size. But I think it’s all relative to what you are used to. I’m not overweight, but I am bigger than I used to be. My clothes tell me so. For example – you may remember my pink scallop skirt:

outfits 012

In the blog post I mentioned that it actually ended up being slightly too big and didn’t sit at my waist. I thought about unpicking it and taking it in, but I didn’t (see, I told you I don’t like doing alterations!). Well, it turned out to be a good thing that I didn’t take it in as it now fits my waist perfectly…and it’s perhaps a wee bit tight on the thighs!

So what do you think would be the best approach? Hold off on sewing clothes and focus whole-heartedly at getting back to my old weight/size, or just start cutting into that gorgeous fabric and use it already? I don’t know! I’m inclined to lean towards the first approach. I don’t like doing alterations, so if I make clothes for my current size I’m going to be left with some lovely homemade clothes that later on won’t fit me, and I’ll never get around to taking in. I find that thought such a shame because ideally I like to think that what I make will be in my wardrobe rotation for as long as possible – classic pieces so to speak. And plus, if my mind is of the opinion that I WILL loose the weight, then I’m not as inclined to put so much effort into my makes, if I know I won’t get an awful lot of use out of them, and then that partly defeats another reason I make clothes – to make something beautiful that I’m proud of!

What are your thoughts on this?

Friday, 6 September 2013

DIY I Do : My Wedding Reception Dress!

RS wedding 605

Well, we had the inspiration post and the muslin post - and finally here is my big reveal!

As I mentioned in the previous posts, I decided that since I had saved money on my main wedding dress, and because it was hard/near impossible to bustle, I would have a go at making a fun and flirty evening/reception dress for my wedding day. 

Su Sews So So Wedding Dress 7

I based the dress on the gorgeous Cambie pattern by Sewaholic, but adjusted it to be strapless. This meant that I had to introduce inner construction details such as boning and a waist stay. I used skills that I had learnt from Gerties Craftsy Bombshell Dress course as well as the Susan Khalje Couture Dress course.

IMG 0853

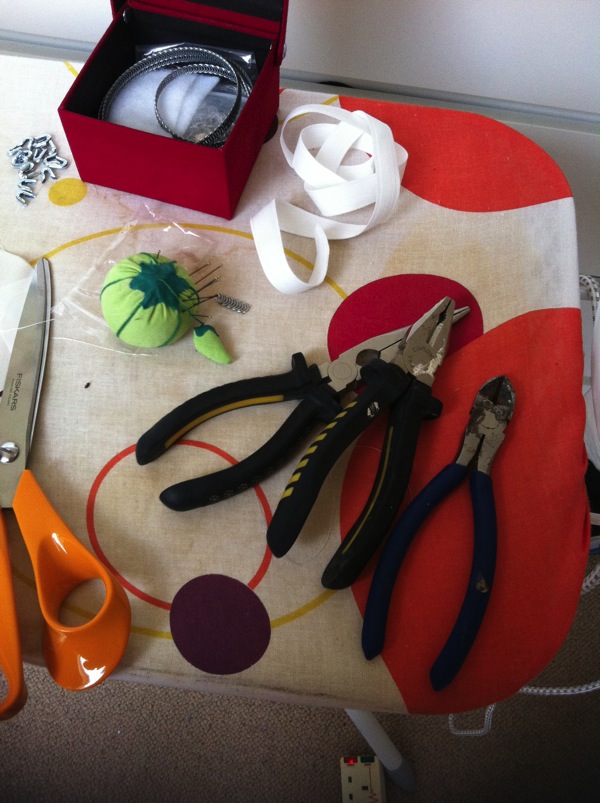
Because Gertie is an advocate for the spiral steel boning and I had previously used it in my Bombshell dress (which I still haven't blogged!!) I thought I should stick with what I knew and use it for this dress. It takes a fair bit of force and fiddling to cut the strips…and I had to raid my husbands tools box:
IMG 0855

…but it's totally worth it as the freedom of movement you get from them is great.
Su Sews So So Wedding Dress 12

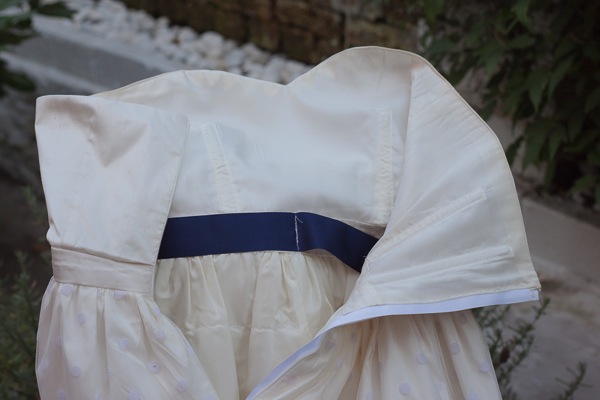
I decided to bring in the blue theme and used a navy blue grosgrain ribbon for my waist stay. I probably should have sewed it in with matching thread - but I was actually working on this until the day before and I think by that time I was just like "I DON'T CARE JUST GET IT DONE"!!! But that aside, the waist stay was an absolute necessity to get the dress zipped up - it holds the dress in place and takes the weight off the zip.

The main dress was made up of a beautiful ivory silk dupion that my mum picked up at a market in Spain for €5/m - yes you read that right, €5 PER METER for real silk dupion!!! The english lady who ran the stall at the market is a retired bridal dressmaker and was selling off all her stash. I think I got my mum to buy about 5m of the ivory for me because at the time I still thought I might be making my main wedding dress, which would have been full-length. So I have quite a bit left in my stash…what to do with it??!!! I'm contemplating trying to dye some and see what it's like. Anyway, I'm getting off track here.

I added in some couture techniques to this dress, such as underlining the silk dupion with silk organza and also basting on all the sewing lines. This was the first time I had worked with silk organza and I loved it. It's such a lovely fabric to work with and gave a little bit extra body to the dupion, which was quite a thin fabric. The dress was lined in the most gorgeously soft and flow-y lining that I bought online at Truro Fabrics. It was more than I normally spend on lining, but em...I recon you can afford to splurge when it's your wedding dress!

Su Sews So So Wedding Dress 13

This is a close up shot of the zip guard that I sewed in with a pick stitch. Again, just another little couture feature. The zip itself was actually an invisible zip which I thought would suit the style of dress better due to the tulle overlay I was doing.
Su Sews So So Wedding Dress 10

Su Sews So So Wedding Dress 6

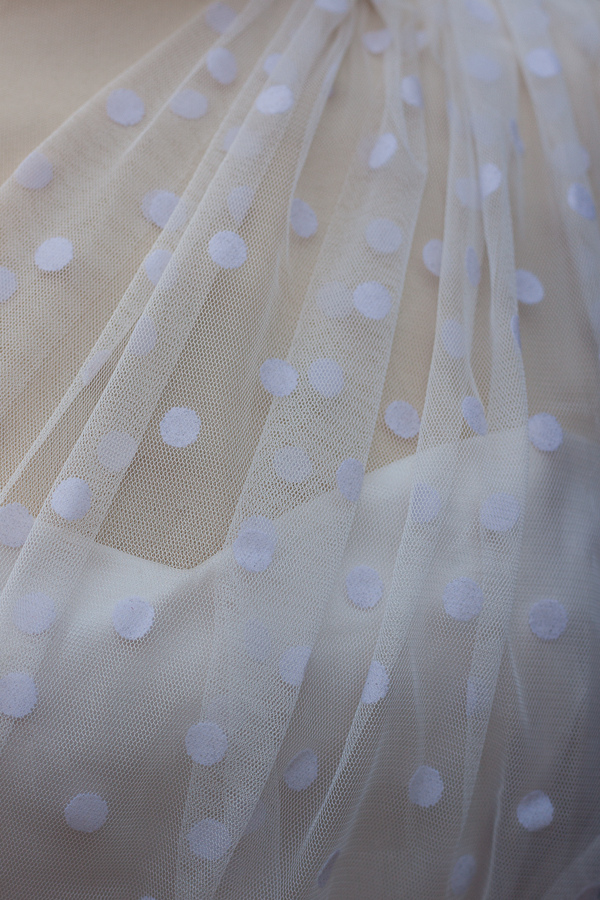
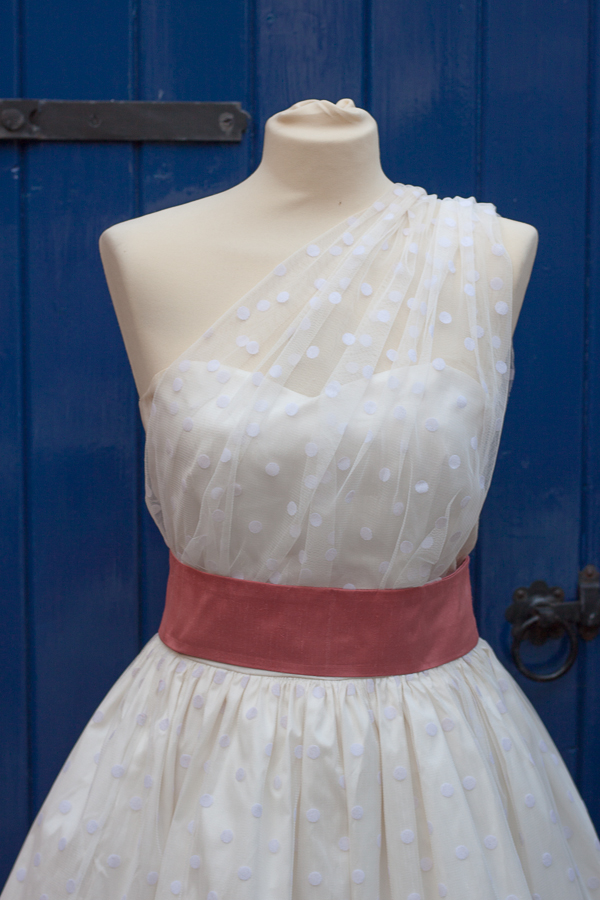
I had a lot of deliberation about how I was going to do the asymmetrical polka dot tulle detail. I initially wanted to build it into the dress, but I obviously didn't have a pattern piece for the tulle and would have had to drape it on me, before the bodice was attached to the skirt - and physically it was impossible. So I decided to make a sort of sash/belt with the tulle attached to it. The draping for this took AGES and was really difficult to get right. It also didn't help that I was doing this the week before the wedding - talk about pressure!!!

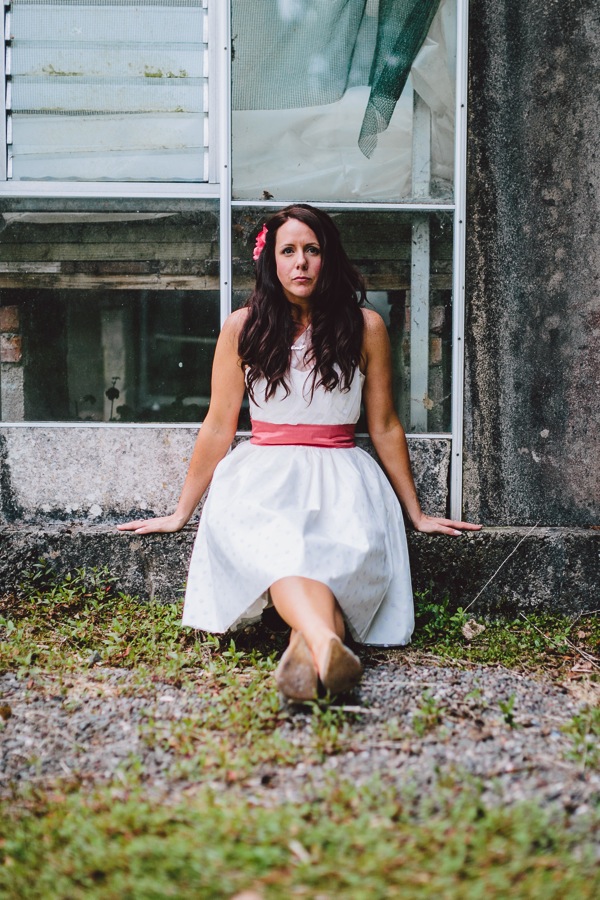
I also decided to make the sash out of the same coral silk that the bridesmaids sashes were made from. I realised this erred on the side of bridesmaid in itself, but as soon as draped the coral silk around the dress I fell in love and it just had to be! Plus I asked my florist to give me a Coral Charm peony to pin into my hair - so it tied together with the sash colour perfectly. 
RS wedding 604

The skirt was made by cutting the full style Cambie skirt (minus pockets - I was tempted, but due to the tulle, decided against it…but I do love Wedding dresses with pockets!) out of both the dupion and the tulle and treating as one layer. Under this I had another layer of very fine plain tulle and then to the lining I sewed two rows of stiff gathered tulle to create volume. This is also how I made the flower girl's dresses.

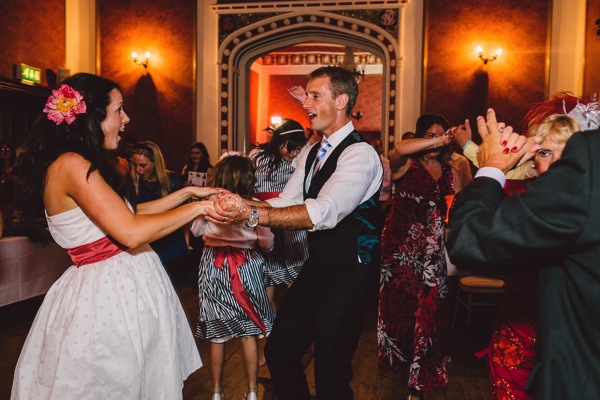
The dress was a lot of fun to wear and to dance in and it was great seeing people's reactions when I came downstairs in a new dress for the evening! The added bonus was that it really showed off my beautiful Jimmy Choo shoes, which up until then had been rather hidden!

I'll leave you with a few professional photos from our mini couples session once I changed dresses (we snuck out during dessert to take these in an abandoned greenhouse/yard at our wedding location) and some of the dancing:

RS wedding 574

RS wedding 587

RS wedding 594

RS wedding 612

RS wedding 623

RS wedding 628

RS wedding 629

Wednesday, 28 August 2013

DIY I Do : My Wedding Reception Dress : A Cambie Muslin

Su Sews So So Cambie 9

In my post earlier in the week I revealed that I had made a dress for my wedding reception. Well, although muslins aren't my favourite thing to do and I have been known not to both with them from time to time, I thought a wedding dress deserved the effort involved in making a muslin! As described in my inspiration post I wanted to make a dress with a full bodied gathered skirt, a sweetheart bodice and a spotty tulle asymmetrical overlay. After searching through my pattern collection I realised that the Sewaholic Cambie dress would be pretty much perfect for this! 

Su Sews So So Cambie 2


Su Sews So So Cambie 4

I had seen so many beautiful versions of this dress so I was excited to finally make one for myself. There was a gorgeous floral cotton in my stash and although I was nervous to 'waste' it on a muslin that might not work out I decided to just go for it and hope for the best! I'm so glad I did as I absolutely LOVE this dress - definitely one of my favourite makes. 

And Tasia strikes again with her fantastic pattern drafting and instruction writing. What a dream this was to sew up. Every step of the way was a joy, and I'm definitely getting good at putting in an invisible zip. I lined the dress in the softest, butteriest white cotton lawn and it is so beautiful next to the skin. Perhaps a little pricey as linings go, but I think I'm converted! The only thing I would say is that occasionally you can see the lining peeking out past the sleeves, as you can see in the above photo, so perhaps I should have under-stitched that or something?

Su Sews So So Cambie 3

Now for the blooper! My dress strangely ended up tight at the waist - like, no eating at all while wearing the dress and sit down while holding your breath in tight! I couldn't understand why this had happened because I was sure that I had cut my size. And then I checked what size I had cut out…yes, I had cut my correct waist size, but it was the waist size of the FINISHED garment I had read, rather than the pattern size to cut (which would have included ease)!!! Doh! So it's a bit on the snug side, to say the least.

Su Sews So So Cambie 5 

Su Sews So So Cambie 6

Ironically this turned out for the best because for my actual wedding reception dress I would be needing to get rid of the sleeves and make the dress strapless. That would mean adding boning for support and a tighter fit would be advantageous as well! Everything happens for a reason so it seems.

On a side note, after wearing this dress a couple of times, I noticed that some of the stitches where you attach the sleeves to the bodice had ripped and the corner of the sleeve is peeking out. I do believe that that is mainly because I have made the dress too tight for me, but it is also a place that would come under a bit of day to day strain, so I would recommend reinforcing that line of stitches if you are ever planning on making a version for yourself.

Su Sews So So Cambie 7


Su Sews So So Cambie 8

So all in all this is a fabulous dress and I am totally in love with it. I feel super girly in it and find myself flouncing around like a fool - but I kind of like that! I see many more Cambies in my life. 

Su Sews So So Cambie 10

 Oh - and it has pockets! I LOVE POCKETS!!!!!

Su Sews So So Cambie 11

That is all.

Tuesday, 27 August 2013

DIY I Do : My Wedding Reception Dress : Inspiration

Yep, you read that correctly, this post is all about the inspiration behind my Wedding Reception Dress, because…I made it!

a7c6b3b4efb5d0eb00bdfa69c28518b1

When I first started looking at wedding dresses I went and tried on a few, including the beautiful Justin Alexander dress above. It was love at first sight, but at £2000*, it was over my budget. My top tip for brides just starting out in their quest to find the perfect wedding dress – don’t try on any dresses that are over your budget…it will only break your heart!

At the same time as trying on dresses I also had a wee thought in the back of my mind that I may try and sew my dress rather than buy one. I mentioned it in this post back in August ‘12, but the majority of comments back were warning me against it, saying I would have enough to worry about without adding to the load. Plus most of my family and close friends and acquaintances also suggested against it. To be honest, do you know how that made me feel? I know this is totally not what they were implying, but I honestly did feel that there was a general consensus that I didn’t have the skills to make my dress. And perhaps that’s true, but doubt fuels my fire and just made me want to prove them wrong! I had a style, the fabric and the franken-pattern all worked out. But I knew it would be a massive undertaking, and I began to doubt myself.

Then I tried on a dress in a bridal shop that gave me the wow feeling – and it was in the sale! At £300 I was sold. It’s the dress I ended up wearing on the day, so you will have already seen some photos of it. BUT – because I had saved so much money on my main wedding dress it was the perfect excuse to have TWO dresses on the day…which meant I could have a go at making the second dress!

Since my main wedding dress had an outer layer of delicate, floaty chiffon that couldn’t be bustled I decided to make a short reception dress that would allow me to bust a move on the dance floor that evening. My mum also told me that she had been able to source some very reasonably priced silk dupion. So, the search began for inspiration (all photo sources can be found on my Pinterest board here):

bb3a10abd1296d4f744f56e351539151

WD Inspiration1

WD Inspiration2

And then I came across this gorgeous dress by Alexandra King (OMG – check out her work, it is fabulous!):

c4a28913fb2036b8c038654132e878c3

I just loved all the fabulous spotty tulle and I also loved the sweetheart neckline and the asymmetry of the tulle at the neck. However, I noticed that all my previous inspiration pictures had either a pleated or gathered skirt made out of ‘stiff’ fabric, which I really liked. So I decided to make a hybrid of the two. Again, some more inspiration pics:

WD Insp3

WD Insp4

I had the silk dupion base fabric, and was able to source the perfect polka-dot tulle from a local fabric shop (for a very reasonable £7/m rather than the crazy price that lace is per meter – another reason for loving the spots!). Next I had to find a suitable pattern – has anyone got any ideas what I might have used? I’ll give you a clue – it’s a pretty recent pattern from a fantastic Indie pattern company. I’ll reveal all in my next post, the muslin!


* I know it’s not the ‘done’ thing to talk about costs, but do you know what – it was the MOST frustrating thing when I first started researching my wedding and I couldn’t find any prices for wedding dresses online, so I had no idea how much they would cost…which is one of the reasons I ended up trying on a dress that was way out of my budget. And by the way, when I say out of my budget – I could have afforded to buy the dress, but I would have had to compromised on some other aspect of the wedding. And to be honest, I couldn’t physically bring myself to shell out £2k on a dress that I would only wear once. But that was due to my own personal priorities (honeymoon was top of our list!). Plus, my logic was that by spending only £300 on my dress I had extra to spend on shoes…which I did! I may have treated myself to this pair of gorgeous Jimmy Choos. And guess what – I will definitely get to wear them more than once (and my dress and shoes combined cost less than the Justin Alexander dress)!

Related Posts with Thumbnails